Please Note: The Paya Virtual Terminal has been updated to a newer version that offers new features and functionality of the program. This article refers to the previous version. For instructions on using the new Paya Exchange Virtual Terminal, please visit, New Sage Exchange: Frequently Asked Questions.
How to store customers' credit card numbers in the Virtual Terminal
Description
Can I store my customers' credit card numbers in the Virtual Terminal?
Resolution
The Virtual Terminal can be used to store your regular customers' information, saving you the time and hassle of entering their billing, shipping, and order information for every transaction.
This guide is intended for merchants with certain customers whom they charge often, but not for the same amount nor on any fixed schedule. If your customers are charged the same amount on a regular basis, you may be interested in setting them up to process automatically. If this is the case, please disregard this guide and refer instead to: How do I set up customers for recurring payments in the Virtual Terminal?
To begin, please follow the instructions, linked above, for setting up a recurring customer. However, when creating the transaction, be sure to set the Status to "Inactive" -- this will prevent the transaction from processing automatically. You will still need to create a group and schedule, but since the transaction is set to Inactive it does not matter how you set up the schedule.
We've now created a customer record, which can be used to quickly and easily "pre-fill" the transaction page. To charge this customer, go to the Recurring menu and select Transactions. Use the search options to find the customer, and then select "Process" from the Options column:
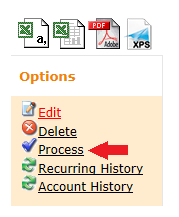
This takes you to the usual one-time transaction page. Instead of being empty, however, the fields will be automatically filled in using the information from the customer record. Change the transaction amount (and any other necessary information), and then press Submit Transaction to charge the card.
If you have questions or require additional information, please submit a ticket and we will be in touch with you shortly.
